HW 7 (Images Part 1)
Assignment overview
Similar to what we did in the images lab in class, in this lab you will practice image manipulation.
Goals
Practice using nested for loops and using a library with objects (Images and Pixels).
Logistics
This is an individual assignment. You are welcome to discuss any part of the assignment with classmates, course staff or Anna. Make sure to cite any help you receive in the "acknowlegdements" portion of the assignment.
This assignment is due at 10PM on Friday, May 8 (this is a shorter turnaround than most assignments, accordingly, this assignment is shorter).
Setup
Mount the COURSES drive and create a folder called hw7 in your STUWORK folder.
Open the new folder in VSCode.
If you need a refresher on how to complete these steps, refer back to the in-class
lab from the first day of class.
Download the starter code
and move the files (images.py, cImage.py, and the test images) into your hw7 folder.
If you are working on your own computer, you may need to install the Python package pillow. To do
so, run the following command from the terminal:
pip3 install pillow
If that doesn't work, you can try pip install pillow instead. If that still doesn't work, reach out
for help, and in the meantime, work on the lab computers.
Part 1: Sepia toned images
For this part, you'll write a filter that converts an image to sepia tones, as illustated by the following image:
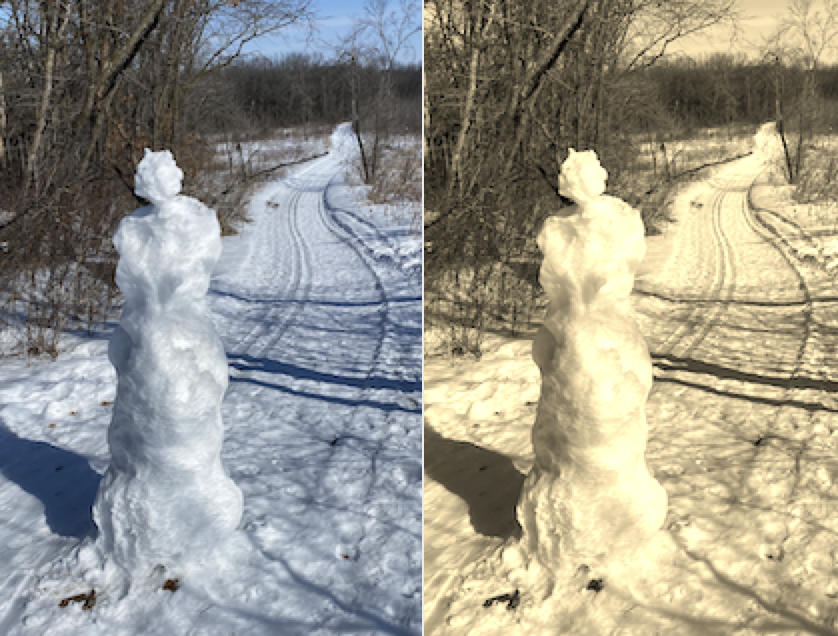
You should write a function sepiaFilter that takes one parameter (an Image object) and returns a
new Image object. Within the sepiaFilter function, you should create a copy of the original image
and then edit its pixels as follows, assuming that a given pixel has original RGB values of
(redOrig, greenOrig, blueOrig):
- New red color: Use the formula
redNew = redOrig * 0.39 + greenOrig * 0.77 + blueOrig * 0.19 - New green color: Use the formula
greenNew = redOrig * 0.35 + greenOrig * 0.69 + blueOrig * 0.17 - New blue color: Use the formula
blueNew = redOrig * 0.27 + greenOrig * 0.53 + blueOrig * 0.13
Remember that pixel RGB values must be integers. Additionally, these equations might give you pixel values that are larger than 255. In that case, you should use 255.
After writing sepiaFilter, you can test it by calling the function testFilter(imageFilename, sepiaFilter),
similar to what we did for the functions we wrote in the in-class lab.
Part 2: Adding a border
Sometimes it's nice to add a border to an image, e.g., as in this image:
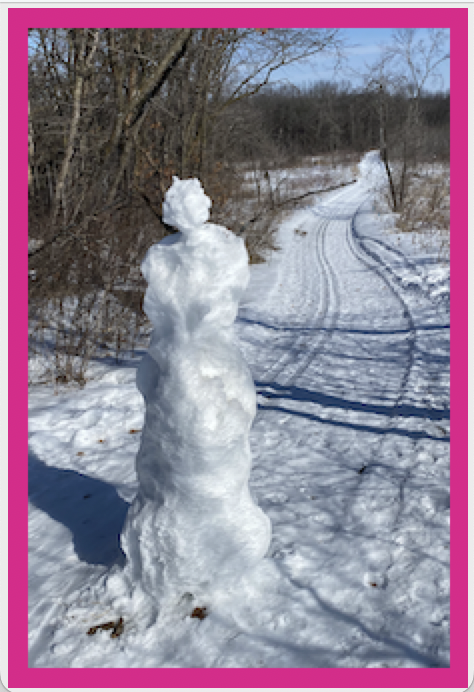
For this part, you'll write a function addBorder. This function should take 3 parameters: an Image object,
a border width (integer), and a border color (tuple of 3 integers). The function should return a new Image object
that is a copy of the original Image object with an added border.
For example, if I use 10 as the border width parameter, I will add rows of 10 pixels to the top and the bottom of the image, and columns of 10 pixels to the sides of the image. In total, if my original image dimensions were m rows and n columns, the new image should have dimension (m + 2 * border width) times (n + 2 * border width). In other words, the border gets added around the image, do not cover up or replace pixels from the original image.
The border color will be a tuple. For example, (255, 0, 0) would correspond to adding a red border.
After you finish writing addBorder you can call display the image by calling displayImage(imgWithBorder) where
imgWithBorder is the image that you returned from addBorder.
Wrap up
When you're finished, make sure to complete the usual documentation steps. This includes adding comments, writing function docstrings, and adding a top-level comment, acknowledgements, and a reflection to the header.
You should also think about coding style. Have you written everything in a consistent way that is easy to read? Does your code have any unnecessary print statements? (Remove them.) Is there any repetitive code that could be rewritten to use loops or helper functions? Review the style document on Moodle for the expectations for this assignment.
Assignment submission and misc. notes
Handing in the assignment
You need to hand in images.py on Gradescope.
Grading
This assignment is worth 20 points, broken up as follows:
- 8 points
sepiaFilter - 8 points
addBorder - 4 points style and following the assignment specifications
Start early, ask lots of questions, and have fun!
Anna's acknowledgements
This assignment was adapted from Anna Rafferty and Layla Oesper's teaching materials. Thanks for sharing!